


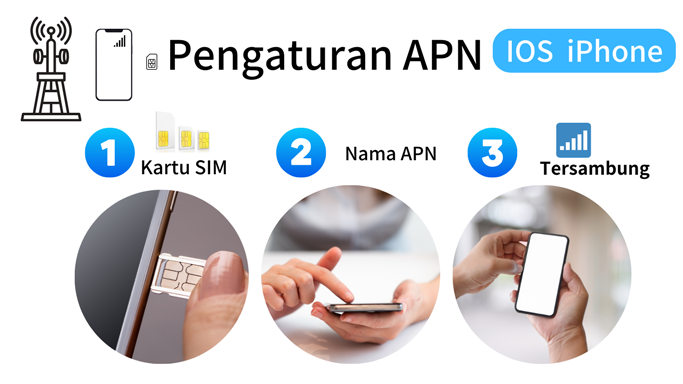
iOS iPhone How to set-up
1) Make sure your iPhone is SIM-free and insert SIM.
2)Check SIM recognition, connect to WIFI, and download your provider's profile
3) After downloading,
Settings → General → VPN and device management and install the downloaded profile
4) Turn off the WiFi connection and restart your iPhone.
5) When the signal is confirmed, the setting is completed.
* For Rakuten SIM, it is set automatically by turning on Wi-Fi. Please restart after setting.
For IOS 18 please follow:


The SIM size of the iPhone is nano.
If the SIM at hand is Micro or Mini, You need a nano size (smallest one). If the SIM card is adjustable, please change it to nano size. If the SIM card is not adjustable. please contact us using the contact form.
Check if your device is SIM unlocked. Or check if your device has usage restrictions. If your device is damaged, please use a new device.
Check if the iPhone profile for the SIM type you purchased has been downloaded successfully, and make sure that the profile has been installed. If you still can't, go to iPhone Settings → Cellular Data and make sure cellular data is on. Or, make sure that data roaming is off. If you cannot solve the problem, please contact us using the contact form below.
Depending on the service, the APN information of the SIM will be different. Please check the service details enclosed with the SIM by mail. If you can't make an improvement, please request support using the form
Turn on and off the power of your iPhone. If the problem persists, go to iPhone Settings → Mobile Data and check if cellular data is on. Or, make sure that data roaming is off. Check if your data is used in your plan. The Internet will stop if you use all the data you have subscribed to. The new GB data will be updated from the 1st of the following month. If you want to change/add a plan, please refer to SERVICE PLAN. Or, please check your monthly payment. If you have any questions, please contact us using the contact form below.
When the data of your plan is used up or the price limit of the paid service is exceeded, you will receive an SMS from the 157 number. If you would like to change/add a plan, please contact us using the contact form below.
The PIN number is different for each carrier.
Please check the list below for the default numbers.
If you changed it yourself, please enter the changed number.
Softbank PIN (default): 9999
Docomo PIN number (default): 0000
AU PIN number (default):1234
If you make a mistake in the PIN number several times, you will be required to enter the PUK.
If you make a mistake in the PIN number several times, you will be required to enter the PUK.
In that case, please request a number using the form below.
Please allow up to 2 business days for the PUK number to be verified. Please note that if you exceed the number of mistakes in the PUK, the SIM will be invalid. In that case, you will need to reissue the SIM card.
If the SIM can be reissued, you can request a reissue of the SIM card. Please make a request using the form. In that case, a reissue fee will be charged. Please check the price list.
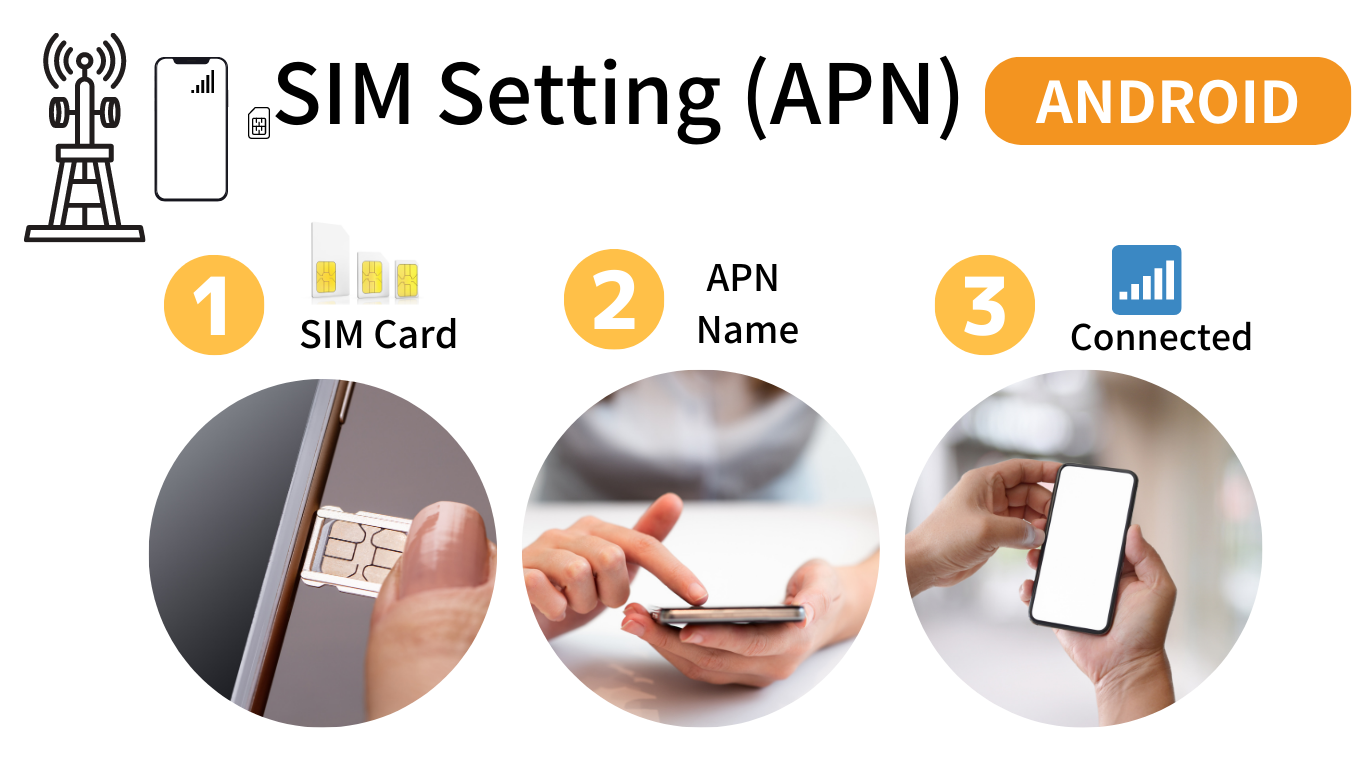
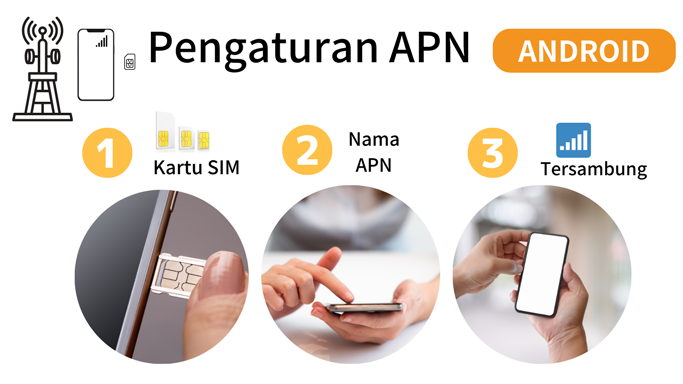
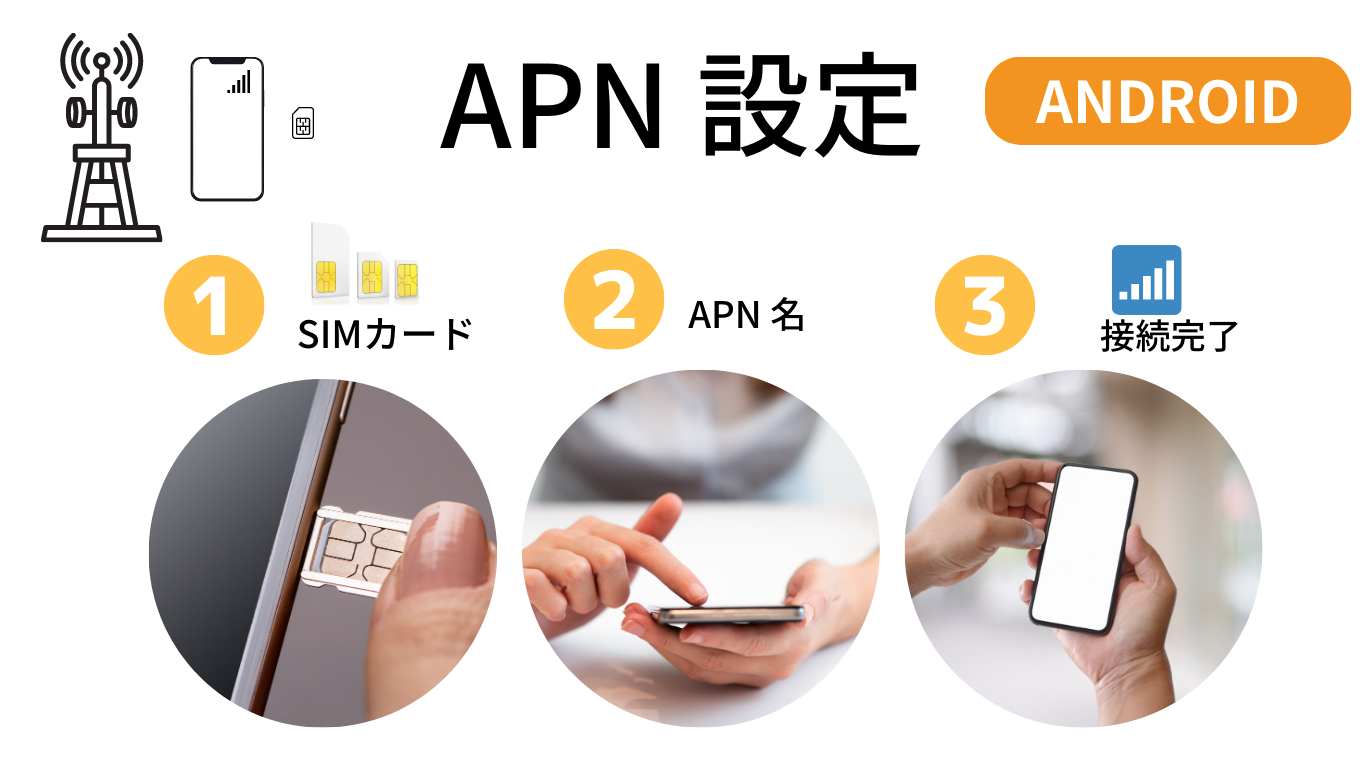
Android Smartphone setting
1) Confirm that the device is SIM-free and insert the SIM.
2 ) Check SIM recognition and APN information
3) Register APN information on the access point.
4) If you can check the signal bar, restart it and use it.
*If some devices already have APN settings, please select APN to use.
SOFTBANK
APN: plus.4g
User: plus
Password: 4g
Authentication Type: PAP or CHAP
DOCOMO
APN: dm.jplat.net
User: a@a
Password: aa
Authentication Type: PAP or CHAP
****************************
DOCOMO 2
APN: espas.com
User: a@a
Password: aa
Authentication Type: PAP or CHAP
****************************
DOCOMO ( 30GB/50GB with 5 mins free)
APN: ppsim.jp
User: pp@sim
Password: jpn
Authentication Type: PAP or CHAP
RAKUTEN
APN: rakuten.jp
The SIM size should be Mini, Micro, and nano size. If the size does not fit, please use a SIM adapter.
Check if your device is SIM unlocked. Or check if your device has usage restrictions. If your device is damaged, please use a new device. Check your Sims for damage.
Please check that the SIM type and APN information you have set are correct. Misspellings or mistakes in the password will not be recognized, so in that case, delete the settings and set a new APN. If it doesn't work, go to your device's Settings → Mobile Networks and make sure the mobile data option is on. If you cannot solve the problem, please contact us using the inquiry form below.
Depending on the service, the APN information of the SIM will be different. Please check the service details enclosed with the SIM by mail. (Important Documents) If you can't make an improvement, please request support using the form
Turn the device back on once. If it does not work, go to your device's settings → mobile networks and check if the mobile data option is on. For the COMBO plan: Device Settings → Go to Mobile Networks and check if your data card is correctly selected for the data sim (usually Sim 2). Or check the data used by your plan. The Internet will stop if you use all the data you have subscribed to. The data will be updated from the 1st of the following month. If you would like to change/add a plan, please contact us using the inquiry form below. Or, please check the payment relationship. If you have any questions, please contact us using the inquiry form below.
When the data of your plan is used up or the price limit of the paid service is exceeded, you will receive an SMS from the 157 number. If you would like to change/add a plan, please contact us using the inquiry form below.
The PIN number is different for each carrier.
Please check the list below for the default numbers.
If you changed it yourself, please enter the changed number.
Softbank PIN (default): 9999
Docomo PIN number (default): 0000
AU PIN number (default):1234
If you make a mistake in the PIN number several times, you will be required to enter the PUK.
If you make a mistake in the PIN number several times, you will be required to enter the PUK. In that case, please request a number using the form below. Please allow up to 2 business days for the PUK number to be verified. Please note that if you exceed the number of mistakes in the PUK, the SIM will be invalid. In that case, you will need to reissue the SIM card.
If the SIM can be reissued, you can request a re-issue of the SIM card. Please make a request using the form. In that case, a reissue fee will be charged. Please check the price list.
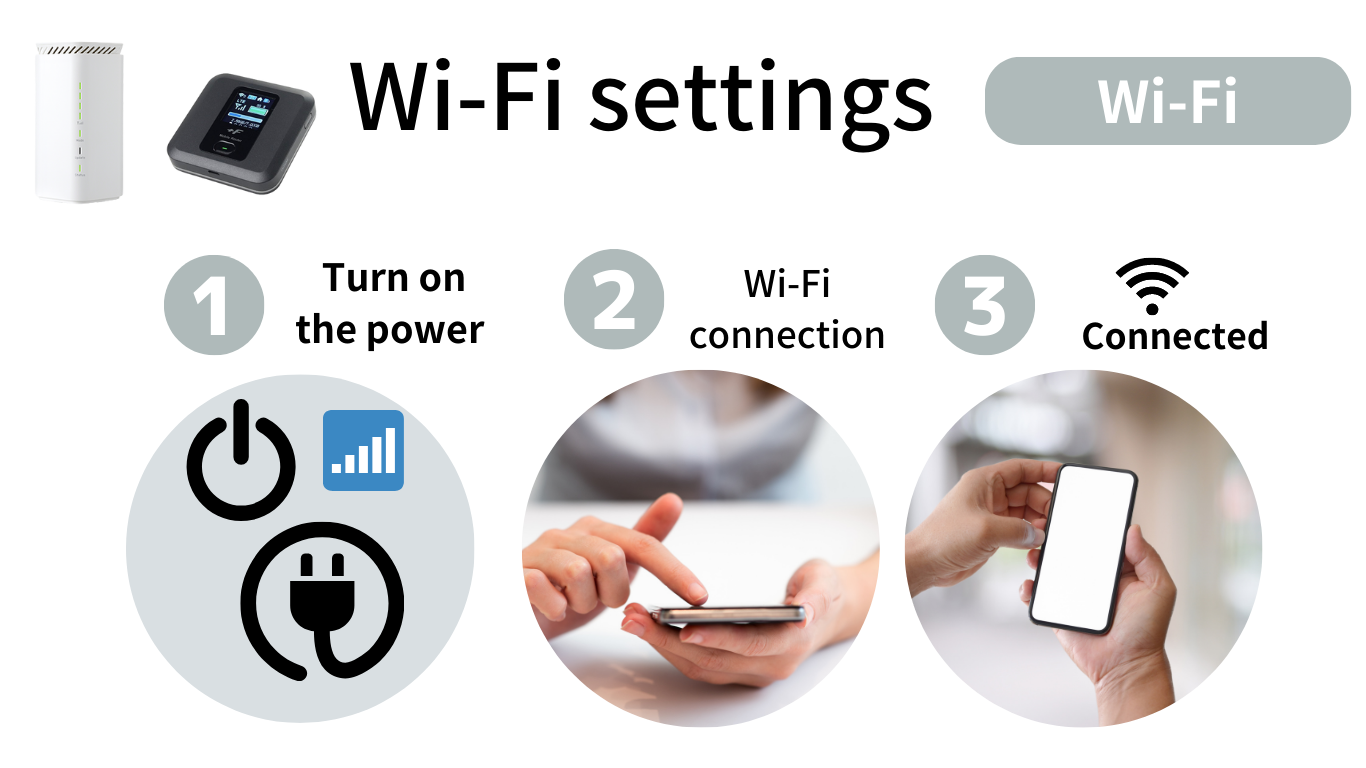
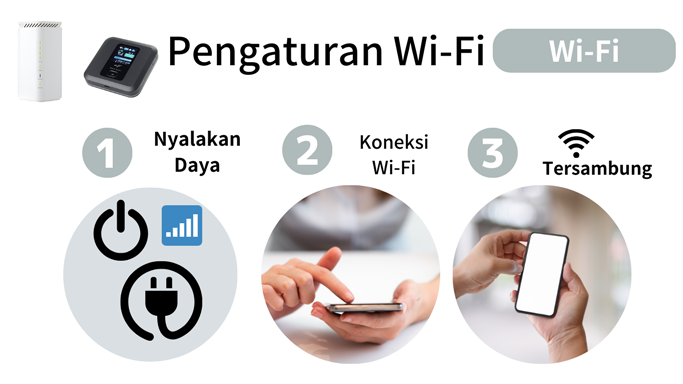
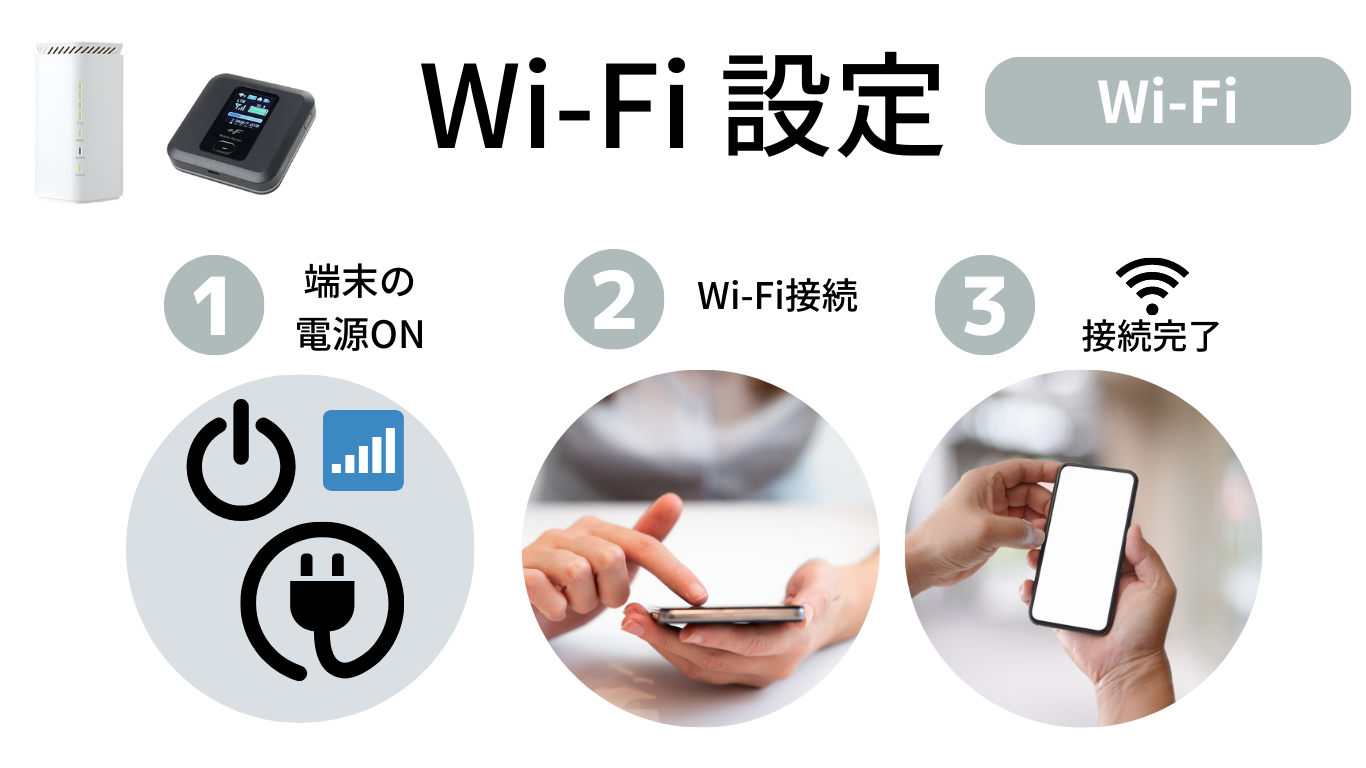
Wi-Fi Setting
How to Connect
1) Turn on the device by pressing and holding the power button.
2) After the antenna appears on the screen, press the menu button again.
3) Choose the network name( プライマリSSID) on your device ( smartphone, table, computer etc)
4) Enter the password ( プライマリKey)
Wi-Fi Setting
How to connect (X11 model)
1) Hold down the power button until the "NEC" id displayed in the display.
2) Press once ▲
3) Press once ▼ to select "Information" and press◎ to enter.
4) Press once ▲ to select "Wi-Fi" and press ◎ to enter.
5) On the screen it will appear SSID ( connection name )
6) Press once ▼ to see the password ( PW1)
7) Search the Network Name ( SSID) on your cellphone, tablet, computer, etc., and insert the password.
How to connect (X12 model)
1) Hold down the power button until the "NEC" id displayed in the display.
2) Press once ▲
3) Press once ▼ to select "Wi-Fi LAN" and press ◎ to enter.
4) Press once ▲ to select "Wi-Fi Info" and press ◎ to enter.
5) On the screen it will appear SSID (connection name) and Password
6) Search the Network Name (SSID) on your cellphone, tablet, computer, etc., and insert the password.
DO NOT RESET: Do not press the mode button ordo not change to "Plus Area Mode"(orange lamp), if you have changed it, service will be limited to 15GB/month and there will be an additional 1,100 yen fee per month.

Wi-Fi Setting
How to connect
1) Turn on the device by pressing and holding the Power button
2) The Network Name and the Password will show on the DISPLAY.
3)Choose the Network Name on your device (smartphone, tablet, computer etc)
4) Enter the password
If you can not use, try these steps:
1) Go to "More", then "SIM Card Manager".
2) On "SIM Card", tap "Switch", confirm with "OK".
3) On "SIM Card", tap "Network disabled", Turn off the "SIM card data network", confirm with "OK". Then, turn it on again.
4) Turn off "Data Roaming"
5) Go to "APN settings", JB APN should appear.
6) 4G should be visible in the top right corner of your screen.
Wi-Fi Setting
How to connect ( PC )
1) Connect the DC plug of the AC adapter to the power terminal and wait until the status lamp lights green.
2) Connect the LAN cable on the home router and your computer.
How to connect ( Wi-Fi)
1) Connect the DC plug of the AC adapter to the power terminal and confirm that the status lamp lights green.
2) On the bottom of the device, check the network name ( SSID ) and password (暗号化キー)
3) Search the network name( Wi-Fi name) on your device( cellphone, tablet, computer etc) and insert the password.(暗号キー)
DO NOT RESET: Do not press the mode button ordo not change to "Plus Area Mode"(orange lamp), if you have changed it, service will be limited to 15GB/month and there will be an additional 1,100 yen fee per month.
Please double-check the Wi-Fi connection password. When typing, b aware of uppercase, lowercase, or special characters. If you cannot solve the problem, please contact us using the inquiry form below.
Check the signal status on the screen of the Wi-Fi device while moving the location. In the case of the HOME ROUTER, the four lamps from the top are the antenna signal. Move to a place where it will be green. If you cannot solve the problem, please contact us using the inquiry form below.
Turn your Wi-Fi device back on once. Or make sure that the device you want to use the Internet is connected to a Wi-Fi terminal. Alternatively, check the data used on the Wi-Fi terminal screen. The Internet will stop if you use all the data you have subscribed to. The new data will be updated from the 1st of the following month. If you would like to change/add a plan, please contact us using the inquiry form below. Or, please check your monthly payment. If you have any questions, please contact us using the inquiry form below.
Press and hold the update button on the back of the Home Router device for 5 seconds. The orange light will light up slowly. When the update button turns green, the update is complete.
We can send a new device. Please make a request using the form. In that case, a new device fee will be charged. Please check the price list.
{formbuilder:ODEwMw==}
iOS iPhone How to set-up
1) Make sure your iPhone is SIM-free and insert SIM.
2)Check SIM recognition, connect to WIFI, and download your provider's profile
3) After downloading,
Settings → General → VPN and device management and install the downloaded profile
4) Turn off the WiFi connection and restart your iPhone.
5) When the signal is confirmed, the setting is completed.
* For Rakuten SIM, it is set automatically by turning on Wi-Fi. Please restart after setting.
The SIM size of the iPhone is nano.
If the SIM at hand is Micro or Mini, You need a nano size (smallest one). If the SIM card is adjustable, please change it to nano size. If the SIM card is not adjustable. please contact us using the contact form.
Check if your device is SIM unlocked. Or check if your device has usage restrictions. If your device is damaged, please use a new device.
Check if the iPhone profile for the SIM type you purchased has been downloaded successfully, and make sure that the profile has been installed. If you still can't, go to iPhone Settings → Cellular Data and make sure cellular data is on. Or, make sure that data roaming is off. If you cannot solve the problem, please contact us using the contact form below.
Depending on the service, the APN information of the SIM will be different. Please check the service details enclosed with the SIM by mail. If you can't make an improvement, please request support using the form
Turn on and off the power of your iPhone. If the problem persists, go to iPhone Settings → Mobile Data and check if cellular data is on. Or, make sure that data roaming is off. Check if your data is used in your plan. The Internet will stop if you use all the data you have subscribed to. The new GB data will be updated from the 1st of the following month. If you want to change/add a plan, please refer to SERVICE PLAN. Or, please check your monthly payment. If you have any questions, please contact us using the contact form below.
When the data of your plan is used up or the price limit of the paid service is exceeded, you will receive an SMS from the 157 number. If you would like to change/add a plan, please contact us using the contact form below.
The PIN number is different for each carrier.
Please check the list below for the default numbers.
If you changed it yourself, please enter the changed number.
Softbank PIN (default): 9999
Docomo PIN number (default): 0000
AU PIN number (default):1234
If you make a mistake in the PIN number several times, you will be required to enter the PUK.
If you make a mistake in the PIN number several times, you will be required to enter the PUK.
In that case, please request a number using the form below.
Please allow up to 2 business days for the PUK number to be verified. Please note that if you exceed the number of mistakes in the PUK, the SIM will be invalid. In that case, you will need to reissue the SIM card.
If the SIM can be reissued, you can request a reissue of the SIM card. Please make a request using the form. In that case, a reissue fee will be charged. Please check the price list.
Android Smartphone setting
1) Confirm that the device is SIM-free and insert the SIM.
2 ) Check SIM recognition and APN information
3) Register APN information on the access point.
4) If you can check the signal bar, restart it and use it.
*If some devices already have APN settings, please select APN to use.
SOFTBANK
APN Name:plus.4g
User: plus
Password: 4g
Authentication Type: PAP or CHAP
DOCOMO
APN Name:dm.jplat.net
User: a@a
Password: aa
Authentication Type: PAP or CHAP
****************************
DOCOMO 2
APN Name:espas.com
User: a@a
Password: aa
Authentication Type: PAP or CHAP
RAKUTEN
APN Name:rakuten.jp
The SIM size should be Mini, Micro, and nano size. If the size does not fit, please use a SIM adapter.
Check if your device is SIM unlocked. Or check if your device has usage restrictions. If your device is damaged, please use a new device. Check your Sims for damage.
Please check that the SIM type and APN information you have set are correct. Misspellings or mistakes in the password will not be recognized, so in that case, delete the settings and set a new APN. If it doesn't work, go to your device's Settings → Mobile Networks and make sure the mobile data option is on. If you cannot solve the problem, please contact us using the inquiry form below.
Depending on the service, the APN information of the SIM will be different. Please check the service details enclosed with the SIM by mail. (Important Documents) If you can't make an improvement, please request support using the form
Turn the device back on once. If it does not work, go to your device's settings → mobile networks and check if the mobile data option is on. For the COMBO plan: Device Settings → Go to Mobile Networks and check if your data card is correctly selected for the data sim (usually Sim 2). Or check the data used by your plan. The Internet will stop if you use all the data you have subscribed to. The data will be updated from the 1st of the following month. If you would like to change/add a plan, please contact us using the inquiry form below. Or, please check the payment relationship. If you have any questions, please contact us using the inquiry form below.
When the data of your plan is used up or the price limit of the paid service is exceeded, you will receive an SMS from the 157 number. If you would like to change/add a plan, please contact us using the inquiry form below.
The PIN number is different for each carrier. Please check the list below for the default numbers. If you changed it yourself, please enter the changed number. Softbank PIN (default): 9999 Docomo PIN number (default): AU PIN number (default): If you make a mistake in the PIN number several times, you will be required to enter the PUK.
If you make a mistake in the PIN number several times, you will be required to enter the PUK. In that case, please request a number using the form below. Please allow up to 2 business days for the PUK number to be verified. Please note that if you exceed the number of mistakes in the PUK, the SIM will be invalid. In that case, you will need to reissue the SIM card.
If the SIM can be reissued, you can request a re-issue of the SIM card. Please make a request using the form. In that case, a reissue fee will be charged. Please check the price list.
Wi-Fi Setting
How to Connect
1) Turn on the device by pressing and holding the power button.
2) After the antenna appears on the screen, press the menu button again.
3) Choose the network name( プライマリSSID) on your device ( smartphone, table, computer etc)
4) Enter the password ( プライマリKey)
Wi-Fi Setting
How to connect
1) Hold down the power button until the "NEC" id displayed in the display.
2) Press once ▲
3)Press once ▼ to select "Information" and press◎ to enter.
4) Press once ▲ to select "Wi-Fi" and press ◎ to enter.
5) On the screen it will appear SSID ( connection name )
6) Press once ▼ to see the password ( PW1)
7) Search the Network Name ( SSID) on your cellphone, tablet, computer, etc., and insert the password.
DO NOT RESET: Do not press the mode button ordo not change to "Plus Area Mode"(orange lamp), if you have changed it, service will be limited to 15GB/month and there will be an additional 1,100 yen fee per month.
Wi-Fi Setting
How to connect
1) Turn on the device by pressing and holding the Power button
2) The Network Name and the Password will show on the DISPLAY
3)Choose the Network Name on your device (smartphone, tablet, computer etc)
4) Enter the password
If you can not use, try these steps:
1) Go to "More", then "SIM Card Manager".
2) On "SIM Card", tap "Switch", confirm with "OK".
3) On "SIM Card", tap "Network disabled", Turn off the "SIM card data network", confirm with "OK". Then, turn it on again.
4) Turn off "Data Roaming".
5) Go to "APN settings", JB APN should appear.
6) 4G should be visible in the top right corner of your screen.
Wi-Fi Setting
How to connect ( PC )
1) Connect the DC plug of the AC adapter to the power terminal and wait until the status lamp lights green.
2) Connect the LAN cable on the home router and your computer.
How to connect ( Wi-Fi)
1) Connect the DC plug of the AC adapter to the power terminal and confirm that the status lamp lights green.
2) On the bottom of the device, check the network name ( SSID ) and password (暗号化キー)
3) Search the network name( Wi-Fi name) on your device( cellphone, tablet, computer etc) and insert the password.(暗号キー)
DO NOT RESET: Do not press the mode button ordo not change to "Plus Area Mode"(orange lamp), if you have changed it, service will be limited to 15GB/month and there will be an additional 1,100 yen fee per month.
Please double-check the Wi-Fi connection password. When typing, b aware of uppercase, lowercase, or special characters. If you cannot solve the problem, please contact us using the inquiry form below.
Check the signal status on the screen of the Wi-Fi device while moving the location. In the case of the HOME ROUTER, the four lamps from the top are the antenna signal. Move to a place where it will be green. If you cannot solve the problem, please contact us using the inquiry form below.
Turn your Wi-Fi device back on once. Or make sure that the device you want to use the Internet is connected to a Wi-Fi terminal. Alternatively, check the data used on the Wi-Fi terminal screen. The Internet will stop if you use all the data you have subscribed to. The new data will be updated from the 1st of the following month. If you would like to change/add a plan, please contact us using the inquiry form below. Or, please check your monthly payment. If you have any questions, please contact us using the inquiry form below.
Press and hold the update button on the back of the Home Router device for 5 seconds. The orange light will light up slowly. When the update button turns green, the update is complete.
We can send a new device. Please make a request using the form. In that case, a new device fee will be charged. Please check the price list.
{formbuilder:ODEwMw==}
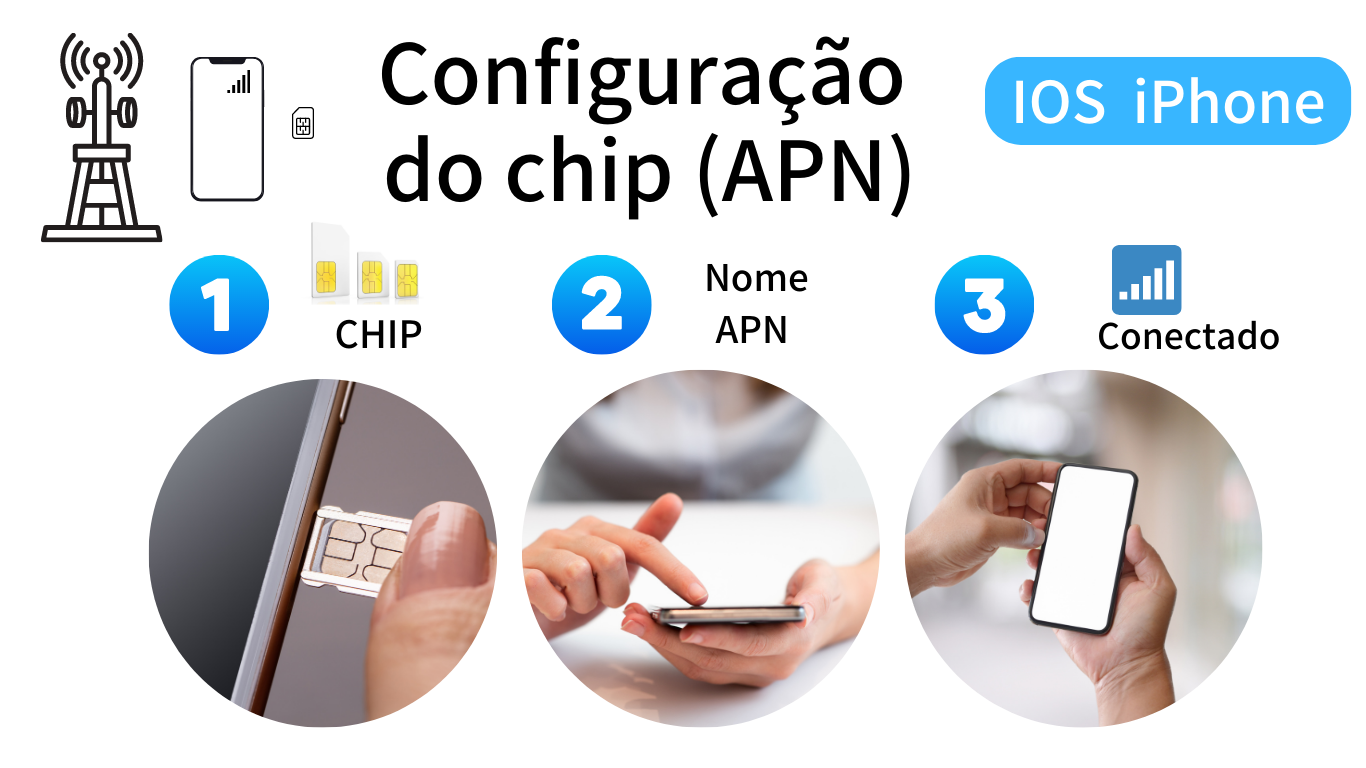
Como configurar no IOS iPhone
1) Insira o chip no iPhone desbloqueado (SIM FREE)
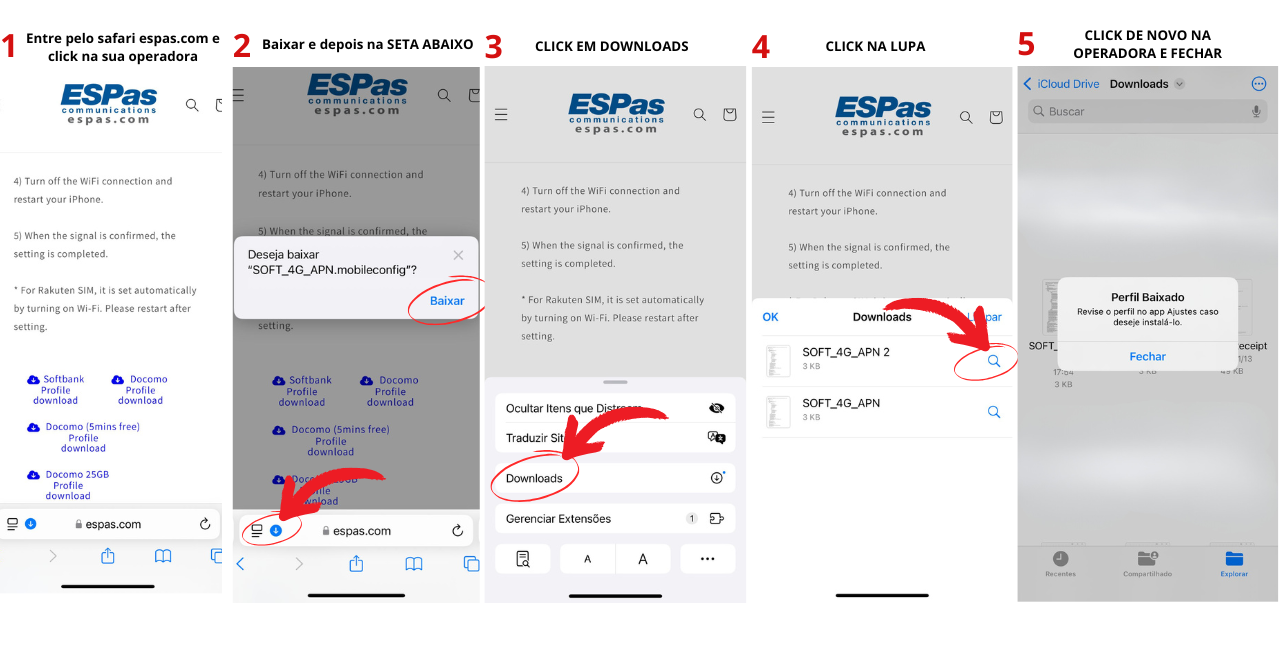
2) Verifique se o iPhone reconhece o chip. Conecte-se a uma rede Wi-Fi e faça o download do perfil de seu chip:
DOWNLOAD
do perfilDocomo
DOWNLOAD
do perfilDocomo 2
DOWNLOAD
do perfilDocomo 25GB
DOWNLOAD
do perfil
3) Após o download, entre em "Ajustes" → "Geral" → "Gerenciamento de
VPN e Dispositivo", pressione no perfil baixado e instale (parte superior direito da tela)
4) No iPhone, desligue a opção do Wi-Fi e reinicie o iPhone
5) Após aparecer as antenas na tela, a configuração foi concluída
*No caso de chip da Rakuten, basta ativar a opção de Wi-Fi no iPhone e a configuração será feita automaticamente. Após configuração, reinicie o iPhone e pronto.
Se não conseguiu, consulte "Perguntas frequentes" ou preencha o formulário abaixo
Para IOS 18 siga estes passos:

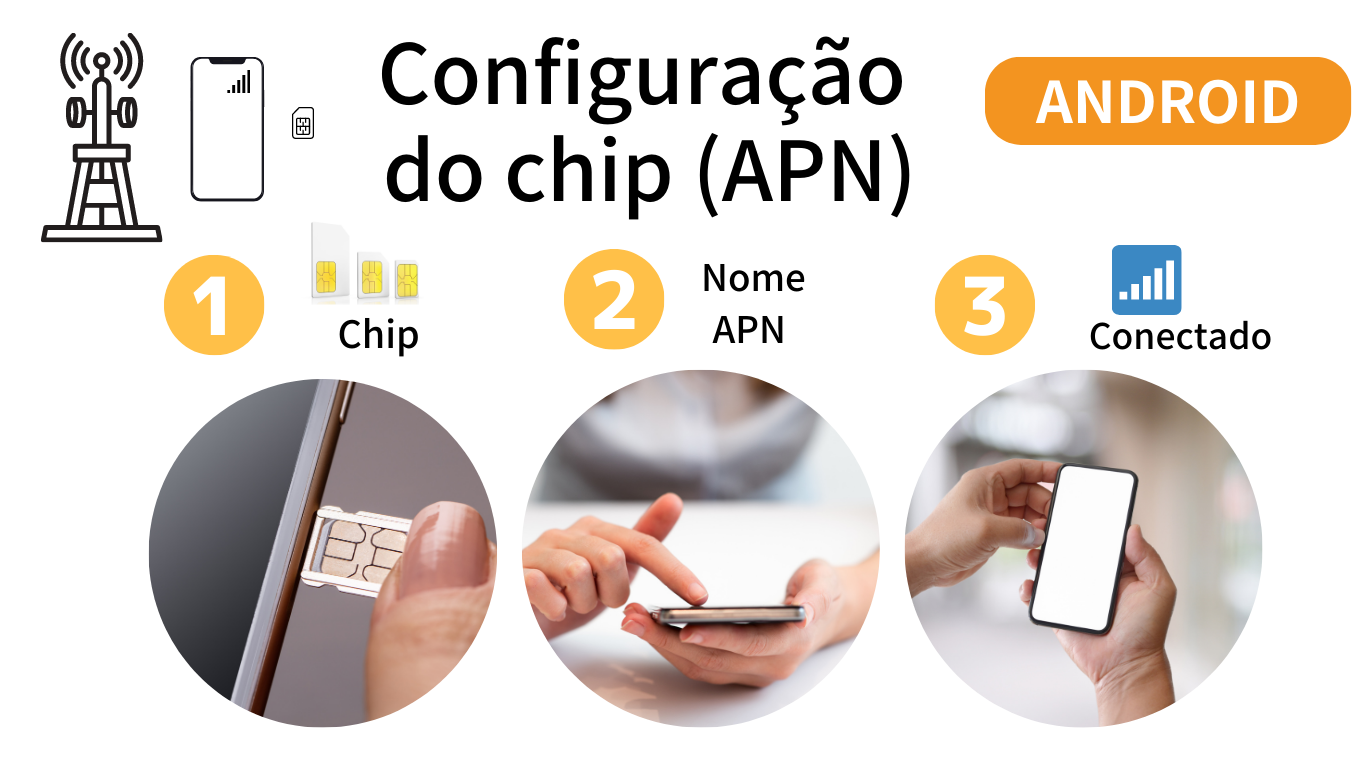
Como configurar no Smartphone Android
1) Insira o chip no smartphone desbloqueado (SIM FREE)
2) Verifique se o smartphone reconhece o chip.
3) Entre em "Configurações" → "Redes Móves" ou "Redes Celulares" → "Nomes de Ponto de Acesso (APN)"
4) Pressione o " + " e preencha com os dados de seu tipo de chip e salve
5) Verifique se este novo APN criado está selecionado
6) Caso o Wi-Fi do celular estiver ativo, desligue e verifique se a internet está ativa
*No caso de chip da Rakuten, basta ativar a opção de Wi-Fi no smartphone e a configuração será feita automaticamente. Após configuração, reinicie o smartphone e pronto.
Se não conseguiu, consulte "Perguntas frequentes" ou preencha o formulário abaixo
SOFTBANK
APN:plus.4g
Nome de usuário: plus
Senha: 4g
Tipo de autenticação: PAP ou CHAP
DOCOMO
APN:dm.jplat.net
Nome de usuário: a@a
Senha: aa
Tipo de autenticação: PAP ou CHAP
*******************
DOCOMO2
APN:espas.com
Nome de usuário: a@a
Senha: aa
Tipo de autenticação: PAP ou CHAP
*******************
DOCOMO 25GB
APN: dm.jplat.net
Nome de usuário: 25gb@psim.jp
Senha: psim
Tipo de autenticação: CHAP
RAKUTEN
APN: rakuten.jp

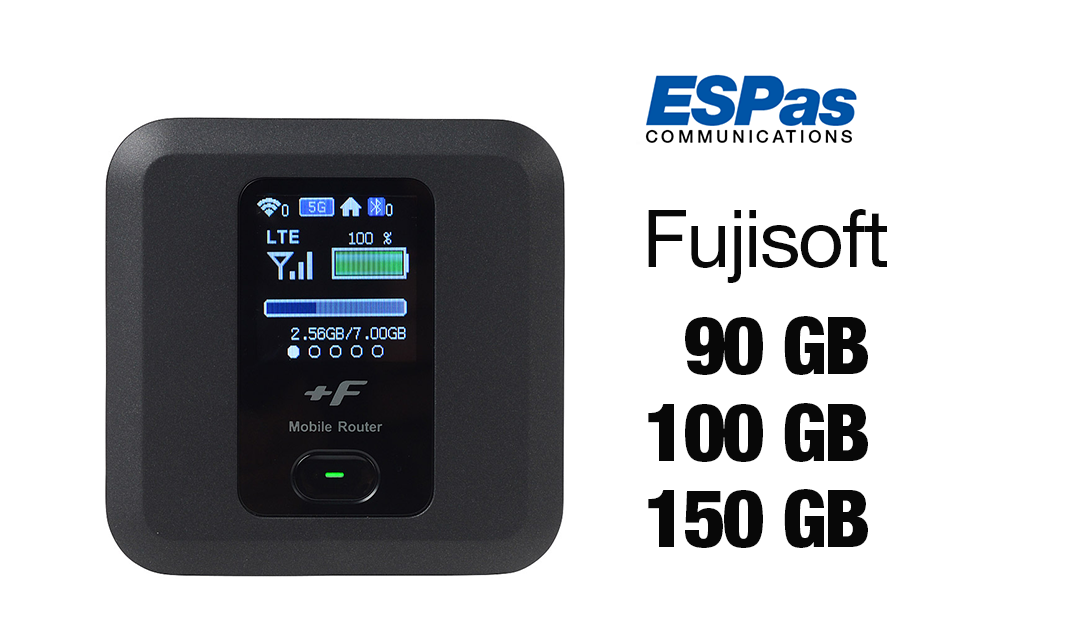
Modelo FS030W
✅ Como Conectar?
1. Ligue o roteador pressionando e segurando o botão Liga/desliga
2. Após aparecer a antena na tela, pressione mais 1 vez o botão Liga/desliga O プライマリSSID (Nome da Conexão) e o プライマリKey (Senha) serão mostrados na tela
3. Procure o Nome da Conexão (プライマリSSID) no aparelho que deseja conectar (celular, tablet, etc)
4. Insira a Senha (プライマリKey), pronto!Em caso de dúvidas, entre em contato através do "Formulário de Suporte" abaixo.
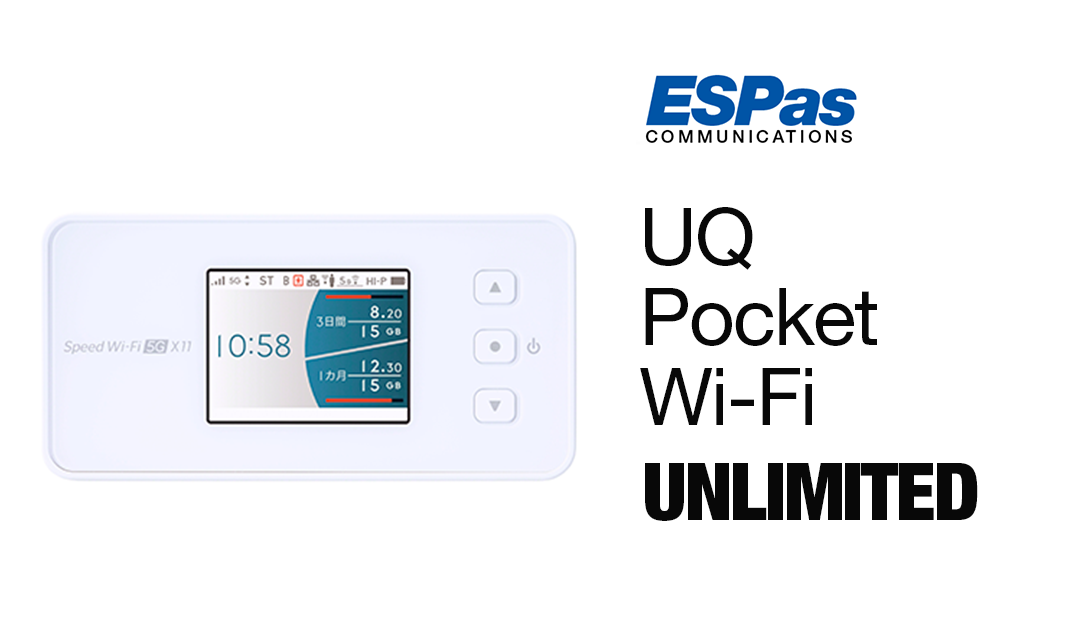
Modelo X11 / X12

1. Pressione o botão de ligar e desligar até na tela aparecer "NEC"
2. Pressione uma vez o botão (seta p/ cima)
3. Pressione uma vez o botão (seta p/ baixo) para selecionar "Information" e pressione o botão ⭘ para entrar
7. Procure o Nome da Conexão (SSID) no celular, tablet, etc e insira o Senha (Password -PW1)
1. Pressione o botão de ligar e desligar até na tela aparecer "NEC"
2. Pressione uma vez o botão (seta p/ cima)
3. Pressione uma vez o botão (seta p/ baixo) para selecionar "Wi-Fi/LAN" e pressione o botão ⭘ para entrar
7. Procure o Nome da Conexão (SSID) no celular, tablet, etc e insira o Senha (Password)
Em caso de dúvidas, entre em contato através do "Formulário de Suporte" abaixo.

✅ Como Conectar?
1. Ligue o roteador pressionando e segurando o botão Liga/desliga
2. O NOME DA CONEXÃO e a SENHA serão mostrados na TELA
3. Procure o Nome da Conexão no aparelho que deseja conectar (celular, tablet, etc)
4. Insira a Senha
Se não conseguir usar, tente estes passos:
1. Vá em "More", depois em "SIM Card Manager".
2. Em "SIM Card", toque "Switch" e confirme com "OK".
3. Em "SIM Card", toque "Network disabled", desative o "SIM card data network"e confirme com "OK". Em seguida, ative novamente.
4. Desative "Data Roaming".
5. Vá em "APN settings", o APN JB deve aparecer
6. O 4G deve estar visível no canto superior direito da sua tela.

Como Conectar:
No Celular:
1. Conecte o cabo de energia no roateador e ligue na tomada. Aguarde até a lâmpada Status ficar verde
2. Na parte de baixo do aparelho, verifique o Nome da Conexão (SSID) e a Senha (暗号化キー)
3. Procure o Nome da Conexão (SSID) no aparelho que deseja conectar (celular, tablet, etc) e insira o Senha (暗号化キー)
No PC:
1. Conecte o cabo de energia no roteador e ligue na tomada. Aguarde até a lâmpada Status ficar verde
2. Conecte o cabo Lan no Home Router e em seu computador
⚠ ATENÇÃO! Não resetar, não alterar!
Não pressione o botão mode ou não mude para "Plus Area Mode" (lâmpada laranja).
O serviço limitará a 15GB/mês e haverá taxa adicional de ¥ 1,100 por mês se alterado.
Em caso de dúvidas, entre em contato através do "Formulário de Suporte" abaixo.
O tamanho do chip do iPhone/Smartphone é NANO.
Se o seu chip for MICRO ou MINI, remova o quadro até que fique no tamanho NANO (menor).
Se seu chip não possui a moldura que pode ser removida, entre em contato conosco através do formulário de consulta.
Certifique-se de que seuiPhone/Smartphone está desbloqueado. Ou verifique se o uso de seu iPhone/Smartphone está restrito pela operadora.
Se o seu iPhone/Smartphone estiver danificado, use um novo celular desbloqueado.
iPhone:
1. Verifique novamente se fez download do perfil correto para seu tipo de chip, e se ele foi instalado com sucesso.
2. Verifique no iPhone em "Ajustes" → "Celular" se a opção de "Dados móveis" está ativada. Ou verifique se o roaming está inativo.
Caso não conseguir resolver o problema, entre em contato conosco através do formulário de consulta abaixo.
Smartphone:
1. Confirme novamente se configurou com os dados específicos para seu tipo de chip. Se incorreto, crie um novo APN.
2. Verifique se os dados digitados estão corretos. Se incorreto, edite novamente e salve.
3. Verifique em "Configurações" → "Redes Móves" ou "Redes Celulares" se a opção de "Dados móveis" está ativada.
Caso não conseguir resolver o problema, entre em contato conosco através do formulário de consulta abaixo.
As informações de APN do chip diferem dependendo do plano.
Por favor, verifique o documento com Detalhes do Plano que foi enviando juntamente com o Chip.
Em caso de dúvidas, utilize o formulário para solicitar suporte.
iPhone:
1) Tente desligar e ligar o iPhone uma vez.
2) Se não conseguir resolver o problema, no iPhone em "Ajustes" → "Celular" verifique se a opção de "Dados móveis" está ativada. Ou verifique se o roaming está inativo.
3) Verifique quantos Gigas de internet tem seu plano. Se já esgotou os Gigas disponíveis no mês, a internet para de funcionar.
No 1º dia do mês, desligue e ligue novamente seu iPhone, a internet retornará automaticamente.
Caso deseja alterar/adicionar plano, utilize o formulário para solicitar suporte.
4) Verifique se o pagamento de sua fatura está em dia.
Em caso de dúvidas, entre em contato através do formulário abaixo.
Smartphone:
1) Tente desligar e ligar o smartphone uma vez.
2) Se não conseguir resolver o problema, vá em "Configurações" → "Redes Móves" ou "Redes Celulares" se a opção de "Dados móveis" está ativada.
Caso deseja alterar/adicionar plano, utilize o formulário para solicitar suporte.
5) Verifique se o pagamento de sua fatura está em dia.
Em caso de dúvidas, entre em contato através do formulário abaixo.
Se recebeu esta mensagem, significa que já usou os dados disponíveis de seu plano. No 1º dia do mês, desligue seu celular e ligue novamente. A internet retornará automaticamente.
Em caso de dúvidas, utilize o formulário para solicitar suporte.
O número PIN é diferente para cada operadora.
Verifique a lista abaixo para os números padrão.
Se você mesmo o alterou, digite o número alterado.
PIN Softbank (padrão): 9999
PIN Docomo (padrão): 0000
PIN da AU (padrão): 1234
Note que se errar o número PIN várias vezes, será necessário inserir o número PUK.
Se errou o número PIN várias vezes, será necessário inserir o PUK.
Nesse caso, faça a solicitação do número no formulário abaixo.
Aguarde até 2 dias úteis para que o número PUK seja verificado.
Note que se você exceder o número de tentativas do PUK, o chip ficará inválido. Nesse caso, você precisará solicitar a 2a via do chip.
Se o chip puder ser reemitido, você poderá solicitar a 2a via do chip.
Solicite através do formulário abaixo. Para tarifa de 2a via, verifique a tabela de procedimento e solicitações
1. Confirme novamente a senha. Atente para letras maiúsculas ou minúsculas e/ou caracteres especiais.
2. No aparelho Wi-Fi, certifique que as antenas estão aparecendo no visor. Caso não esteja, tente mudar de lugar e teste novamente o sinal.
Em caso de dúvidas, entre em contato através do formulário abaixo.
Mova o aparelho Wi-Fi de lugar até achar a antena.
No caso do Roteador Residencial, as quatro lâmpadas de cima são as antenas. Mova o aparelho de lugar até as lâmpadas da antena ficarem verdes.
Se você não conseguir resolver o problema, entre em contato conosco usando o formulário de consulta abaixo.
1. Desligue uma vez o aparelho e tente ligá-lo novamente.
2. Caso seu plano seja com limite diário. e tenha excedido, aguarde até o dia seguinte. Desligue o aparelho e ligue novamente.
3. Confira na tela do pocket Wi-Fi a quantidade de GBs utilizados. Caso tenha excedido, aguarde até o 1º dia útil do mês. Neste dia, desligue o aparelho uma vez e ligue novamente. A internet retornará automaticamente.
4. Verifique no visor a quantidade de aparelhos conectados. Se estiver "0", tente conectar novamente.
5. Verifique se o pagamento de sua fatura está em dia.
Em caso de dúvidas, entre em contato através do formulário abaixo.
Mantenha pressionado por 5 segundos o botão de atualização na parte de trás. A luz laranja piscará lentamente.
Quando o botão de atualização ficar verde, as atualizações estão concluídas.
É possível solicitar o envio de um novo aparelho. Solicite através do formulário abaixo.
Para tarifa de 2a via, verifique a tabela de procedimento e solicitações.
{formbuilder:ODA4NQ==}

2. Verifique que el iPhone reconoce el chip. Conéctese a una red Wi-Fi y descargue el perfil de su chip:
DOWNLOAD
de perfilDocomo
DOWNLOAD
de perfilDocomo 2
DOWNLOAD
de perfil
3. Después de descargar el perfil, entre a “Configuración” → “General” → “Adm. De dispositivos y VPN”, seleccione el perfil descargado y nuevamente presione “Instalar” (parte superior derecha)
4. En el iPhone, desactive la conexión Wi-Fi y reinicie.
5. Luego, active los datos celulares y listo! La configuración a sido realizada.
*En el caso del chip de Rakuten, basta activar la opción de Wi-Fi que aparece en el iPhone y la configuración será realizada automáticamente. Después de esto, reinicie y listo!
Si no consigue configurar, consulte en “preguntas frecuentes” o complete el formulario a continuación (ver abajo)

2. Verifique que el Smartphone reconozca el chip.
3. Ingrese a “Configuración/Ajustes” →“Redes móviles” →“Nombre de punto de Acceso (APN)”.
4. Presione el signo “+” y complete con los datos de su tipo de chip y GUARDE.
5. Verifique si este nuevo APN creado está seleccionado.
6. En caso caso la conexión Wi-Fi del celular esté activo, desactivar y verifique si los datos móviles están activos.
*En el caso del chip de Rakuten, basta activar la opción de Wi-Fi que aparece en el Smartphone y la configuración será realizada automáticamente. Después de esto, reinicie y listo!
Si no consigue configurar, consulte en “preguntas frecuentes” o complete el formulario a continuación (ver abajo).
SOFTBANK
APN: plus.4g
Nombre de usuario: plus
Contraseña: 4g
Tipo de autenticación: PAP ou CHAP
DOCOMO
APN: dm.jplat.net
Nombre de usuario: a@a
Contraseña: aa
Tipo de autenticación: PAP ou CHAP
*******************
DOCOMO2
APN: espas.com
Nombre de usuario: a@a
Contraseña: aa
Tipo de autenticación: PAP ou CHAP
RAKUTEN
APN: rakuten.jp

Modelo FS030W
Cómo Conectar:
1. Encienda el router presionando y sosteniendo el botón de encendido
2. Después de una antena aparecer en la pantalla, presione una vez más el botón de encendido. El Primary SSID (Nombre de Conexión) y la Primary Key (Contraseña) se mostrará en la pantalla
3. Busque el nombre de la conexión (Primary SSID) en el dispositivo que desea conectar (celular, tablet, etc)
4. Introduzca la contraseña (Primary Key), listo!
Si no consigue configurar, consulte en “preguntas frecuentes” o complete el formulario a continuación (ver abajo).
Modelo X11 / X12
Cómo Conectar (Modelo X11):
1. Presione el botón de encender/apagar hasta que en la pantalla aparezca “NEC”.
2. Presione una vez el botón (flecha arriba)
3. Presione una vez el botón (fecha p/ abajo) p/ seleccionar “Information” y presione el botón ⭘ p/ entrar
6. Presione una vez el botón (fecha p/ abajo) p/ ver la contraseña (Password –PW1)
7. Busque el nombre de la coneción (SSID) en el celular, Tablet, etc. e ingrese la contraseña (Password-PW1)
Si no consigue configurar, consulte en “preguntas frecuentes” o complete el formulario a continuación (ver abajo).
Cómo Conectar (Modelo X12):
1. Presione el botón de encender/apagar hasta que en la pantalla aparezca “NEC”.
2. Presione una vez el botón (flecha arriba)
3. Presione una vez el botón (fecha p/ abajo) p/ seleccionar "Wi-Fi/LAN" y presione ⭘ p/ entrar
4. Presione una vez el botón ⭘ p/ entrar a "Wi-Fi Info"
5. En la pantalla aparecerá el Nombre de la Conexión (SSID) y contraseña (Password)
6. Busque el nombre de la conexión (SSID) en el celular, tablet, etc. e ingrese la contraseña (Password)
Si no consigue configurar, consulte en “preguntas frecuentes” o complete el formulario a continuación (ver abajo).
⚠ ATENCIÓN! 🗙 No resetear, no alterar!
En caso resetee el dispositivo, mudará automáticamente para “Plus Area Mode” El servicio se limitará a 15GB/mes y habrá una tasa adicional de ¥ 1,100 por la alteración.
Cómo Conectar:
1. Encienda el router presionando y sosteniendo el botón de encendido
2. El Nombre de Conexión y la Contraseña se mostrará en la pantalla
3. Busque el nombre de la conexión en el dispositivo que desea conectar (celular, tablet, etc)
4. Introduzca la contraseña
Si no puedes usarlo, intenta estos pasos:
1. Ve a "More", luego a "SIM Card Manager".
2. En "SIM Card", toca "Switch" y confirma con "OK".
3. En "SIM Card", toca "Network disabled", desactiva la "SIM card data network" y confirma con "OK". Luego, vuelve a activarla.
4. Desactiva el "Data Roaming".
5. Ve a "APN settings", debería aparecer el APN JB
6. El 4G debería ser visible en la esquina superior derecha de tu pantalla.
Para celular:
1. Conecte el cable de energía del Router al tomacorriente. Espere hasta que la lámpara “Status” quede en color verde.
2. En la parte de abajo del equipo, verifique el nombre de la conexión (SSID) y la contraseña (暗号化キー)
3. Busque el nombre de Conexión (SSID) en el dispositivo que desea conectar (celular, Tablet, etc.) e ingrese la contraseña (暗号化キー)
Si no consigue configurar, consulte en “preguntas frecuentes” o complete el formulario a continuación (ver abajo).
Para computadora:
1. Conecte el cable de energía del Router al tomacorriente. Espere hasta que la lámpara “Status” quede en color verde.
2. Conecte el cable LAN al Router y a su computadora.
Si no consigue configurar, consulte en “preguntas frecuentes” o complete el formulario a continuación (ver abajo).
⚠ ATENCIÓN! 🗙 No resetear, no alterar!
No presione el botón “Mode” o altere para “Plus Area Mode” (lámpara color anaranjado). El servicio se limitará a 15GB/mes y habrá una tasa adicional de ¥ 1,100 por la alteración.
Si su chip no tiene moldura que pueda ser removida, entre en contacto con nosotros a través el formulario de soporte.
O verifique si su iPhone/Smartphone tiene alguna restricción del operador.
Si su iPhone/Smartphone está dañado, recomendamos usar un nuevo celular desbloqueado.
1. Verifique nuevamente si descargó el perfil correcto para su tipo de chip/plan, y si fue instalado con éxito.
2. Verifique en su iPhone: “Configuración” → “Celular” si la opción de “datos celulares” está activada o si el roaming está inactivo.
Smartphone:
1. Confirme nuevamente si configuró con los datos específicos para su tipo de chip. Si está incorrecto, cree un nuevo APN.
2. Verifique si los datos digitados están correctos, edite nuevamente y GUARDE.
3. Verifique en “Configuración” →“Redes móviles” o “Redes celulares” si la opción de “Datos móviles está activada.
En caso no consiga resolver el problema, entre en contacto con nosotros a través el formulario de soporte.
Por favor, verifique el documento que fue enviado junto con su chip.
Si tuviera alguna duda, utilice el formulario para solicitar soporte.
iPhone:
1. Intente apagar y volver a encender el iPhone.
2. Si persiste, en su iPhone entre en “Configuración” →“Celular” y verifique si la opción de “Datos celulares” está activada o si el roaming está inactivo.
3. Verifique cuántos Gigas de internet tiene su plan. Si ya agotó las gigas del mes, el internet volverá el día 1 del mes siguiente.En caso desee cambiar/adicionar un plan, utilice el formulario para solicitar soporte.
4. Verifique si está al día en sus pagos.
Smartphone:
1. Intente apagar y volver a encender el smartphone.
2. Si persiste, en su Smartphone diríjase a “Configuración” →“Redes móviles” o “Redes celulares” y verifique si la opción de “Datos móviles está activa”.
3. Plan COMBO (2 chips): Diríjase a “Configuración” →“Redes móviles” o “Redes celulares” y verifique si el chip de datos está seleccionado correctamente para datos móviles (generalmente sim2/chip2).
4. Verifique si está al día en sus pagos.
Si tuviera alguna duda, utilice el formulario para solicitar soporte.
Si tuviera alguna duda, utilice el formulario para solicitar soporte.
Si usted alteró el número PIN, debe colocar el número alterado.
PIN Softbank (padrón): 9999
PIN Docomo (padrón): 0000
*Si coloca un número PIN errado repetidas veces, será necesario ingresar el número PUK.
En este caso, realice la solicitud del número en el formulario a continuación (ver abajo). Espero hasta 2 días hábiles para que el número PUK sea verificado.
Solicite a través del formulario a continuación (ver abajo). Para tarifa de reposición/reemisión verifique la tabla de procedimiento y solicitud.
1. Confirme nuevamente la contraseña. Debe copiar tal cuál (mayúsculas o minúsculas y caracteres especiales).
2. En el dispositivo Wi-Fi, verifique que las antenas están apareciendo en la pantalla. En caso no estén intente cambiar de lugar y pruebe nuevamente la señal.
Para cualquier consulta, entre en contacto con nosotros a través del formulario a continuación (ver abajo).
Mueva el pocket de lugar hasta aparecer la antena.
En caso de la Torre residencial, las 4 luces de la parte de arriba son las antenas. Mueva el equipo hasta que las lámparas queden en color verde.
Si no consigue resolver el problema, entre en contacto con nosotros usando el formulario de consulta a continuación (ver abajo).
1. Apague y encienda el equipo.
2. En caso su plan tenga un límite diario y haya excedido las GB, espere hasta el día siguiente. Apague el equipo y encienda nuevamente.
3. Verifique en la pantalla del Pocket Wi-Fi la cantidad de GB utilizados. En caso haya excedido, espere hasta el día 1 del siguiente mes. Este día, apague y vuelva a encender el equipo. El internet renueva automáticamente.
4. Verifique en la pantalla del pocket la cantidad de dispositivos conectados. Si sale “0”, intente conectar nuevamente.
5. Verifique si sus pagos están al día.
Para cualquier consulta, entre en contacto con nosotros a través del formulario a continuación (ver abajo).
Mantenga presionado por 5 segundos el botón de “Update” que se encuentra en la parte de atrás del equipo.
Es posible solicitad el envío de un nuevo equipo.
Solicite por medio del formulario a continuación (ver abajo)
.Para ver las tarifas de reposición o pérdida, verificar la tabla de procedimiento y solicitud.
{formbuilder:MjgxNjg=}
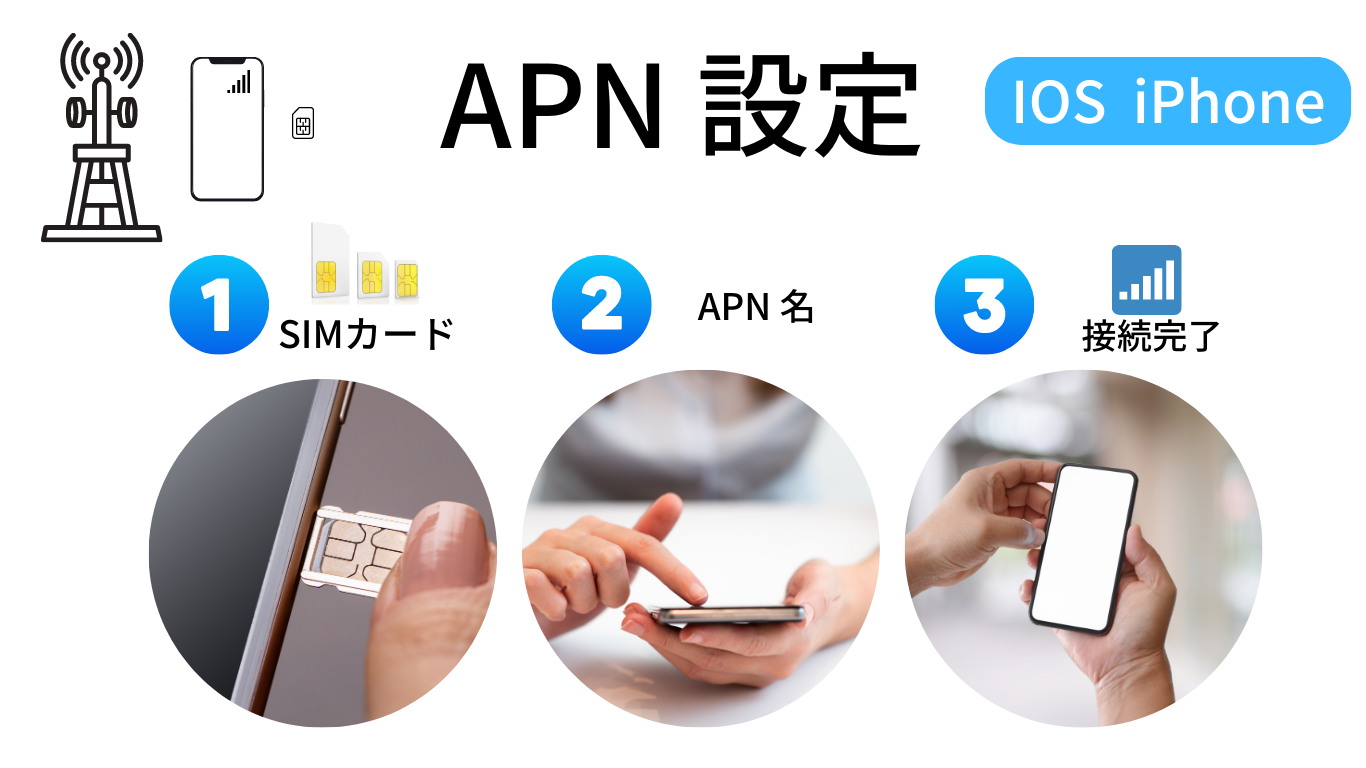
IOS iPhone 設定方法
1)iPhoneがSIMフリーであることを確認し、SIMを挿入。
2)SIMの認識を確認し、WIFI に接続してから、ご利用プロバイダーのプロファイルをダウンロード
3)ダウンロード後、
設定 → 一般 → VPNとデバイス管理に入り、ダウンロードしたプロファイルをインストール
4)WIFI接続をOFFにして、iPhoneを再起動
5)電波の確認が出来ましたら、設定完了。
* RakutenSIMの場合はWi-Fiをオンにすることで自動的に設定されます。設定後再起動してご利用ください。
iPhoneのSIMサイズはNANOです。
手元のSIMがMICROまたはMINIの場合、NANOサイズ(一番小さい)
になるまで枠を外してください。
枠が外せないSIMの場合、問い合わせフォームで連絡ください
端末がSIMロック解除されているか確認してください。 または端末の利用制限が掛かっているか確認してください。 端末が破損されている場合、新たな端末でご利用ください。
ご購入のSIMの種類のiPhone用プロファイルが正常にダウンロードされたかの確認とそのプロファイルのインストールがされているか確認してください。
それでもできない場合、iPhoneの設定 → モバイルデータ通信に入り、モバイルデータ通信がONの状態になっているか確認してください。
または、データローミングがOFFの状態になっているか確認してください。
解決が出来ない場合、下記問い合わせフォームにてご連絡ください。
サービスによって、SIMのAPN情報は異なります。
郵送でSIMに同封された、サービス詳細をご確認ください。
改善ができない場合、フォームでサポート依頼をしてください
iPhoneを1回電源を入れ直してください。
解決が出来ない場合、iPhoneの設定 → モバイルデータ通信に入り、モバイルデータ通信がONの状態になっているか確認してください。 または、データローミングがOFFの状態になっているか確認してください。
プランのGB利用量を確認してください。ご契約のデータ量を全部使った場合、インターネットが止まります。翌月の1日から新しいデータが更新されます。
プラン変更/追加したい場合、サービスプランをご覧ください。
又は、お支払いに未納がないかご確認ください。ご不明な点がありましたら、下記問い合わせフォームにてご連絡ください。
プランのデータ量を使い切った場合、又は有料サービスの料金制限を超えた時、157番号からSMSが届きます。
プラン変更/追加したい場合、下記問い合わせフォームにてご連絡ください。
PIN番号は各キャリアで異なります。デフォルト番号は下記一覧をご確認ください。
ご自身でPIN番号を変更された場合は変更した番号を入力してください。
Softbank PIN番号(デフォルト): 9999
Docomo PIN番号(デフォルト):0000
AU PIN番号(デフォルト):1234
PIN番号何回か間違えますと、PUKの入力が必要になります。
PIN番号何回か間違えますと、PUKを入力が必要になります。 その場合、下記フォームにて番号を依頼してください。 PUK番号の確認に2営業日ほどかかりますのでご了承ください。 なお、PUKの間違い回数を超えますと、SIMが無効になりますのでご注意ください。その場合再発行が必要になります。
再発行が可能なSIMであれば、再発のご依頼が出来ます。問い合わせフォームにてご依頼ください。その際は再発行手数料がかかります。各種手続きにて料金をご確認ください。
Android スマートフォン 設定方法
1)端末がSIMフリーであること確認しSIMを挿入
2)SIMの認識を確認し、APN情報を確認
3)アクセスポイントにAPN情報を登録
4)電波及びアンテナが確認できましたら、再起動してご利用ください
*一部の端末がAPN設定がすでに設定されている場合、APNを選択してご利用ください。
SOFTBANK
APN名:plus.4g
ユーザー: plus
パスワード: 4g
DOCOMO
APN名:dm.jplat.net
ユーザー: a@a
パスワード: aa
Authentication タイプ: PAP or CHAP
***************
DOCOMO2
APN名:espas.com
ユーザー: a@a
パスワード: aa
Authentication タイプ: PAP or CHAP
RAKUTEN
APN名:rakuten.jp
SIMのサイズは MINI,MICROとNANOサイズになります。
サイズが合わない場合SIMアダプターを利用してご利用ください。
端末がSIMロック解除されているか確認してください。 または端末の利用制限が掛かっているか確認してください。
端末が破損されている場合、新たな端末でご利用ください。シムの破損がないかご確認ください。
ご契約のSIMの種類と設定しているAPN情報が正しいか確認ください。
スペルミスやパスワードに間違いがあった場合も認識しませんので、その場合設定を削除してから新たにAPN設定してください。
それでもできない場合、端末の設定 → モバイルネットワークに入り、モバイルデータオプションがONの状態になっているのか確認してください。
解決が出来ない場合、下記問い合わせフォームにてご連絡ください。
サービスによって、SIMのAPN情報は異なります。
郵送でSIMに同封された、サービス詳細をご確認ください。(重要書類)
改善ができない場合、フォームでサポート依頼をしてください。
i端末を1回電源を入れ直してください。
解決が出来ない場合、端末の設定 → モバイルネットワークに入り、モバイルデータオプションがONの状態になっているのか確認してください。
COMBOプランの場合:
端末の設定 → モバイルネットワークに入り、データカードがデータシム(通常シム2)に正しく選択しているかどうか確認してください。
又は プランのGB利用数を確認してください。ご契約のGBを全部使った場合、インターネットが止まります。翌月の1日から新しいGB数が更新されます。
プラン変更/追加したい場合、下記問い合わせフォームにてご連絡ください。
又は、お支払い関係等ご確認ください。ご不明な点がありましたら、下記問い合わせフォームにてご連絡ください。
プランのGB数が使い切った時、又は有料サービスの料金制限を超えた時、157番号からSMSが届きます。 プラン変更/追加したい場合、下記問い合わせフォームにてご連絡ください。
PIN番号は各キャリアで異なります。デフォルト番号は下記一覧をご確認ください。
ご自身でPIN番号を変更された場合は変更した番号を入力してください。
Softbank PIN番号(デフォルト): 9999
Docomo PIN番号(デフォルト):0000
AU PIN番号(デフォルト):1234
PIN番号何回か間違えますと、PUKの入力が必要になります。
PIN番号何回か間違えますと、PUKの入力が必要になります。
その場合、下記問い合わせフォームにて番号を依頼してください。
PUK番号の確認に2営業日ほどかかりますのでご了承ください。
なお、PUKの間違い回数を超えますと、SIMが無効になりますのでご注意ください。その場合再発行が必要になります。
再発行が可能なSIMであれば、再発行のご依頼が出来ます。フォームにてご依頼ください。その際は再発行手数料がかかります。各種手続きにて料金をご確認ください。
Wi-Fi 設定方法
1-電源ボタンを長押しして電源を入れてください。
2-アンテナが画面に出ましたら電源ボタンをもう1度押してください。WiFi(プライマリSSID)とパスワード(プライマリKeyが端末のメイン画面に記載があります。
3-ご利用される端末にてWiFi名(プライマリSSID)をお選び下さい。
4-パスワード(プライマリKey)を入力してください。
Wi-Fi 設定方法
接続方法
PCの場合:
1-本製品の電源端子にACアダプタのDCプラグを接続しACコンセントに差し込んむ。Statusランプが緑点灯になるまで待つ。
2-LANケーブルでホームルーターとパソコンをつなげてください。
携帯電話又はタブレットの場合:
1-本製品の電源端子にACアダプタのDCプラグを接続しACコンセントに差し込む。Statusランプが緑点灯になるまで待つ。
2-WiFi名(SSID)とパスワード(暗号化キー)本製品底面のラベルに記載があります。
3-ご利用される端末にてNetwork Name(SSID)をお選び下さい。
パスワード(暗号化キー)を入力してください。
重要!端末リセット禁止です。
リセットするとプラスモードエリアに変更されます。プランが15GB/月になり、月額料金に1,100円追加されます。
Wi-Fi 設定方法
接続方法
1-”NEC”と画面に表示されるまでボタンを押してください。
2-1回▲を押してください。
3-1回▼を押して”情報”を選択して◎を押して下さい。
4-1回▲を押して”WiFi"を選択して◎を押して下さい。
5-画面にSSID(ネットワーク名)が表示されます。
6-1回▼を押してパスワード(PW1)をご確認ください。
7-お客様のご利用になる端末で(SSID)を探して頂き、パスワードをご入力ください。
重要!端末リセット禁止です。
リセットするとプラスモードエリアに変更されます。プランが15GB/月になり、月額料金に1,100円追加されます。
Wi-Fiの接続パスワードの再確認を行ってください。
入力の際、大文字、小文字又は特殊文字にご注意ください。
解決が出来ない場合、下記問い合わせフォームにてご連絡ください。
Wi-Fi端末の画面にアンテナ状況を確認しながら、設置場所を移動してください。 HOME ROUTERの場合、上から4つのランプがアンテナです。緑になるところへ移動してください。 解決が出来ない場合、下記問い合わせフォームにてご連絡ください。
Wi-Fi端末を1回電源を入れ直してください。
又はインターネットをしたい端末がWi-Fi端末に接続しているかどうか、確認してください。
又は、Wi-Fi端末画面のGB利用数を確認してください。ご契約のデータ量を全部使った場合、インターネットが止まります。翌月の1日から新しいデータ量が更新されます。
プラン変更/追加したい場合、下記問い合わせフォームにてご連絡ください。
又は、お支払い関係等ご確認ください。ご不明な点がありましたら、下記問い合わせフォームにてご連絡ください。
Home Router端末の裏のアップデートボタンを5秒を長押ししてください。
オレンジ色ランプがゆっくり点灯します。アップデートボタンが緑色になったら、更新完了になります。
新たな端末が送ることが出来ます。問い合わせフォームにてご依頼ください。その際は再発行手数料がかかります。各種手続きにて料金をご確認ください。
{formbuilder:NzExMQ==}